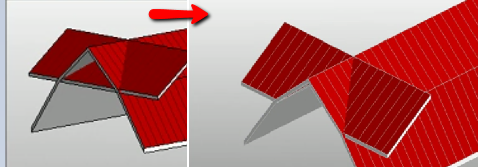
Revit Trim Intersecting Roofs

Trim Interscting Roofs Autodesk Community Revit Products

Revit Roof Basics 04 Intersect By Roof Join Cadclips Youtube
How To Cut A Hole To A Roof Revit Lt 2018 Autodesk Knowledge Network

Revit Roof Cleaning Up Overlapping Roofs Youtube

Solved Intersecting Lines Autodesk Community Revit Products

Solved Roofing Woes Autodesk Community Revit Products
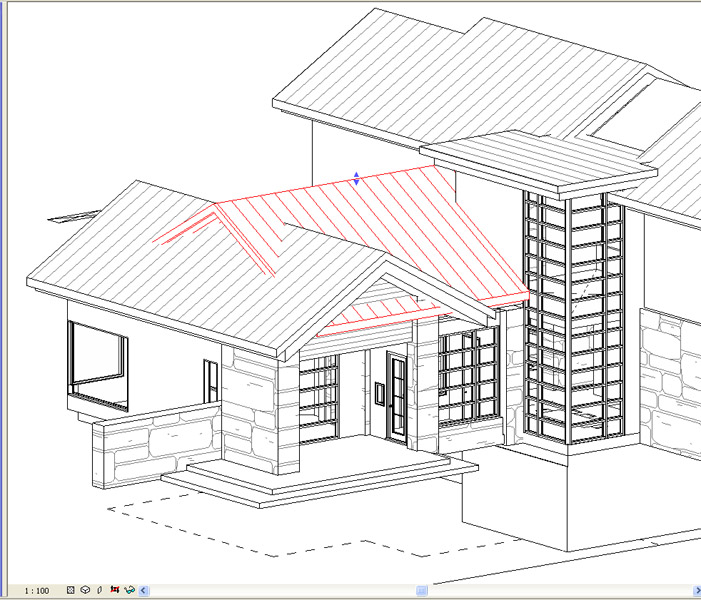
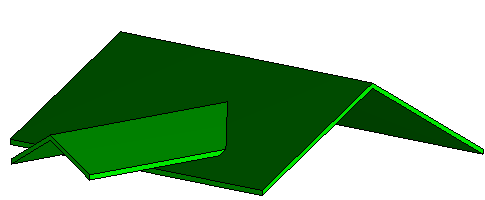
Then you can trim the roof faces to this line.
Revit trim intersecting roofs.
Merging Roofs Autodesk Community Revit Products

Cut Roof Geometry Autodesk Community Revit Products

Revitcity Com Intersecting Roofs

Pin On Mwf Metal Wood Framer

Solved Why Can T I Make This Roof Autodesk Community Revit Products

Cross Gable Roof Gable Roof Design Fibreglass Roof Gable Roof

Pin On Circle Gardens

Roof Join Problem Autodesk Community Revit Products
Revitcity Com With Roofs Grouped Join Roof Tool Not Allowed

Intro To Repeat Intersects And Adaptive Components Intro Intersecting Digital Fabrication

Solved Help A Biggener Lines Cannot Intersect Each Other The Highlighted Lines Curren Autodesk Community Revit Products

Split Surfaces At The Intersection With Other Surfaces Grasshopper Surface Splits Parametric

Revit Tips Join Roof Dormer Opening Youtube

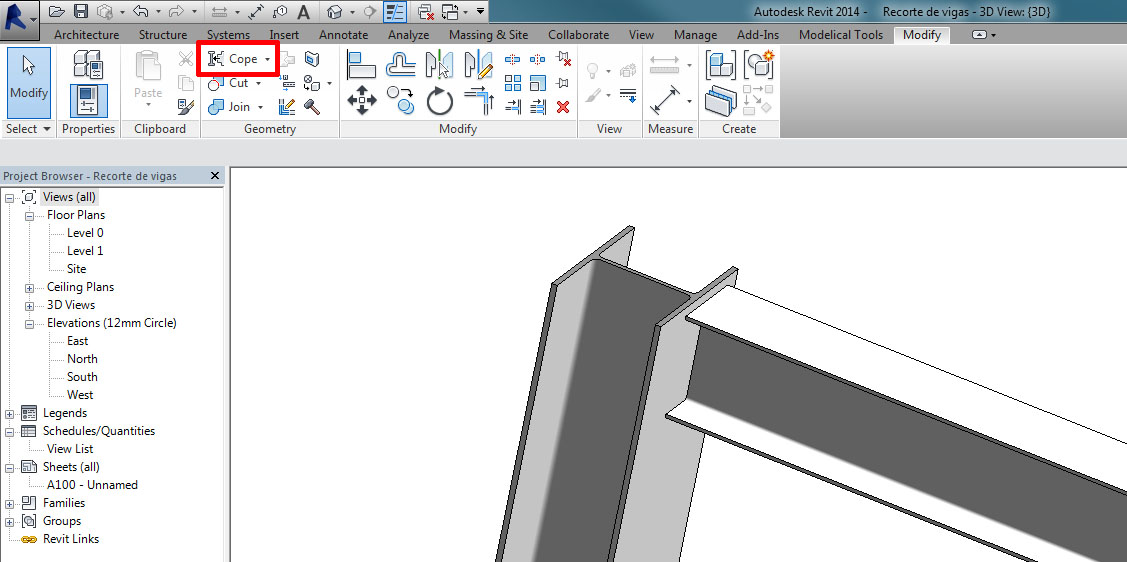
Cut Beams And Columns In Revit Modelical

Solidworks Tutorial 20 Design An Engine Oil Filter In Solidworks Solidworks Tutorial Solidworks Tutorial
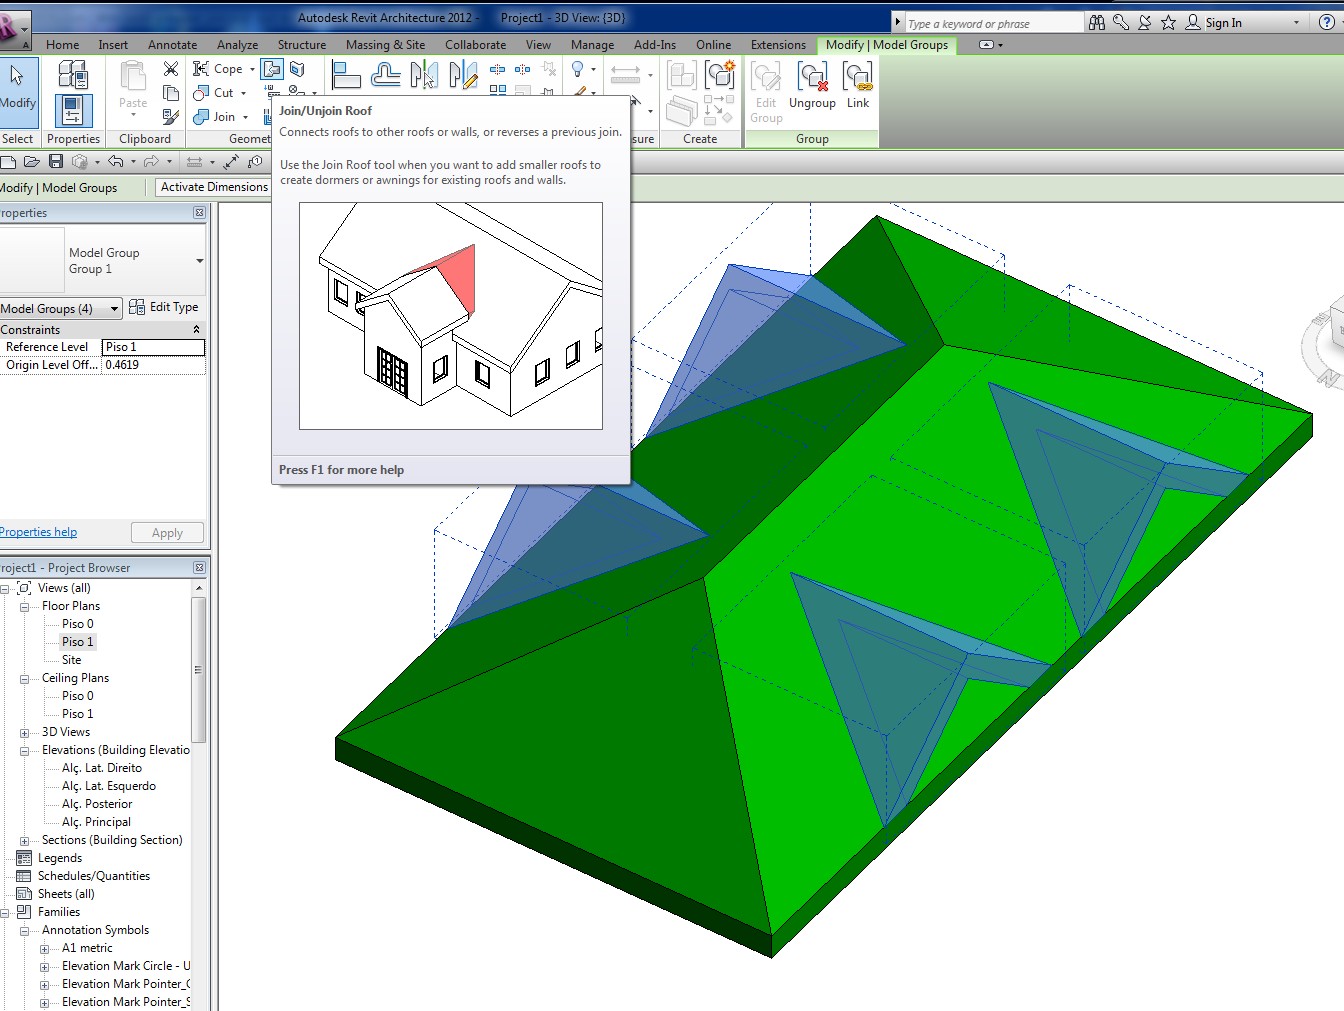
Join Roofs Revit Products 2018 Autodesk Knowledge Network

Solved Wall Won T Join Properly Autodesk Community Revit Products
Https Encrypted Tbn0 Gstatic Com Images Q Tbn 3aand9gcqt Jag1pa Hofhz 59fqg8i0feamtfelr0xlmsrdq6chiqvxbg Usqp Cau

Automatically Prepare 3d Models For Lasercutting In Rhino Parametric Design Grasshopper Parametric Architecture

Revit Structure Best Practices Modelical

How To Cut Openings Around Mep Objects Manually Or Automatically Agacad

Revit Wall Wrap Closure A How To Guide Youtube

Revit Roof Workarounds Youtube
Source : pinterest.com
