Revit Roof Slope Arrow Annotation

Adding Ramp Slope Arrow And Stair Path Arrow Learn Revit Layout Architecture Concept Architecture

Add A Spot Slope Dimension Revit Products Autodesk Knowledge Network
Custom Slope Symbol

Revit 2013 Stair Arrows Stairs Arrow Floor Plans

Autodesk Revit Roof Slope Arrows Youtube

Solved Default Revit Spot Slope Annotation Symbol Size Autodesk Community Revit Products

How to set up the dimension for roof slope in degree products and versions covered revit 2015 revit 2016 revit 2017 revit architecture 2015 revit architecture 2016 revit lt 2015 revit lt 2016 revit lt 2017 revit mep 2015 revit mep 2016 revit structure 2015 revit structure 2016.
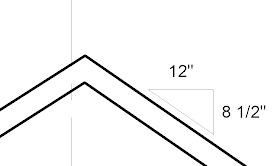
Revit roof slope arrow annotation.

Module 6 Exercise 8 Slope Annotation Youtube

Revit Tips Spanish Roof Adaptive Insane Version Autocad Revit Roof

Revit Roof Basics 10 Slope Arrow Cadclips Youtube

Solved Spot Slope Annotation Offset In Sections Autodesk Community Revit Products

Revit Architecture Modeling Custom Components Part 1 Revit Architecture Revit Tutorial Architecture Model

Working With Slope Arrows

Revit Spot Slope Edit And Add Text Parameter Autodesk Community Revit Products

Roof Slope In 2 Directions With The Same Angle Autodesk Community Revit Products

Revit Tips Insulation Hatch Without Detail Annotation Revit Architecture Revit Tutorial Autodesk Revit

Revit Hands On Back To Basics With Images Back To Basics Basic Model Drawing

Solved Roof That Slopes In 2 Directions Page 2 Autodesk Community Revit Products
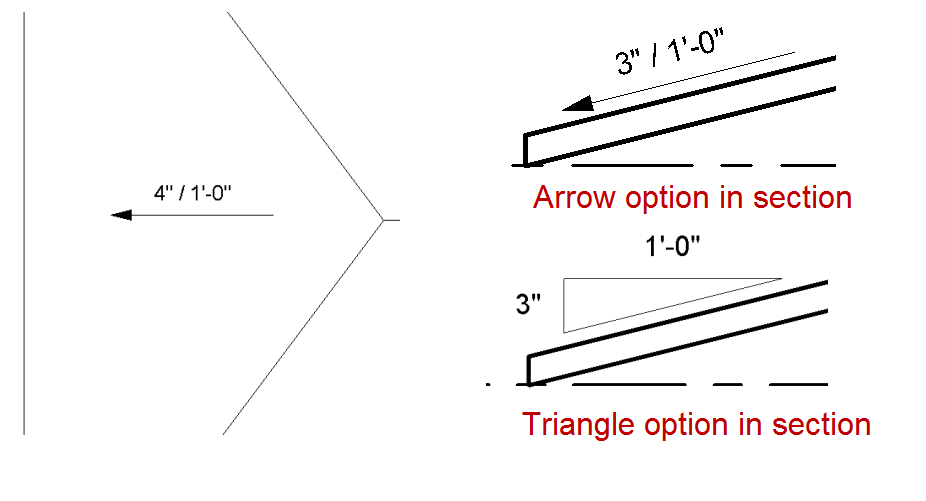
Therevitkid Com Tutorials Tips Products And Information On All Things Revit Bim Revit Tip Show A Triangle On A Spot Slope The Revit Geek

Pin On Revit Arc 2014 Essential Training
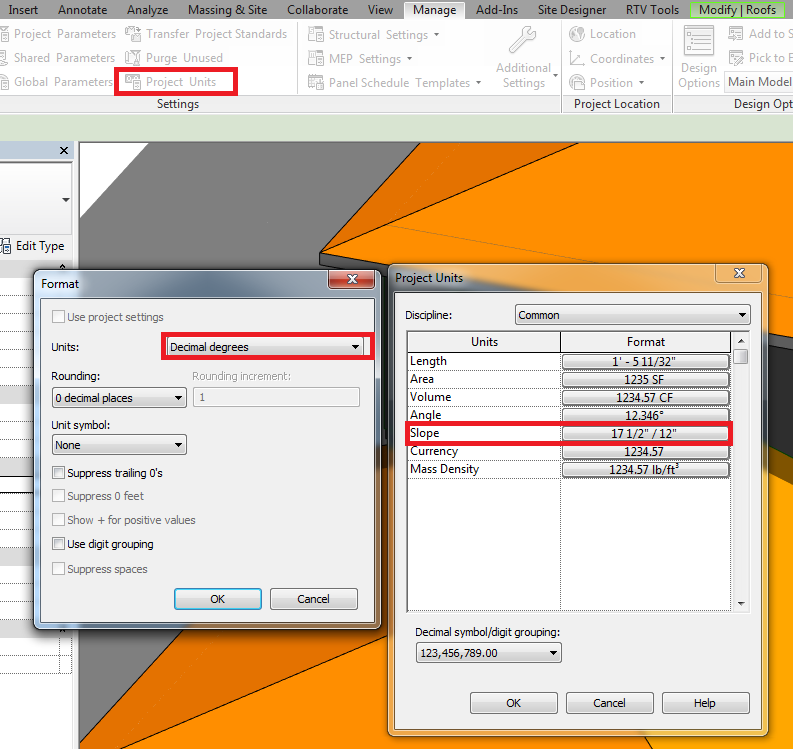
How To Set Up The Dimension For Roof Slope In Degree Revit Products Autodesk Knowledge Network

Specifying Slopes While Using Modify Sub Elements Autodesk Community
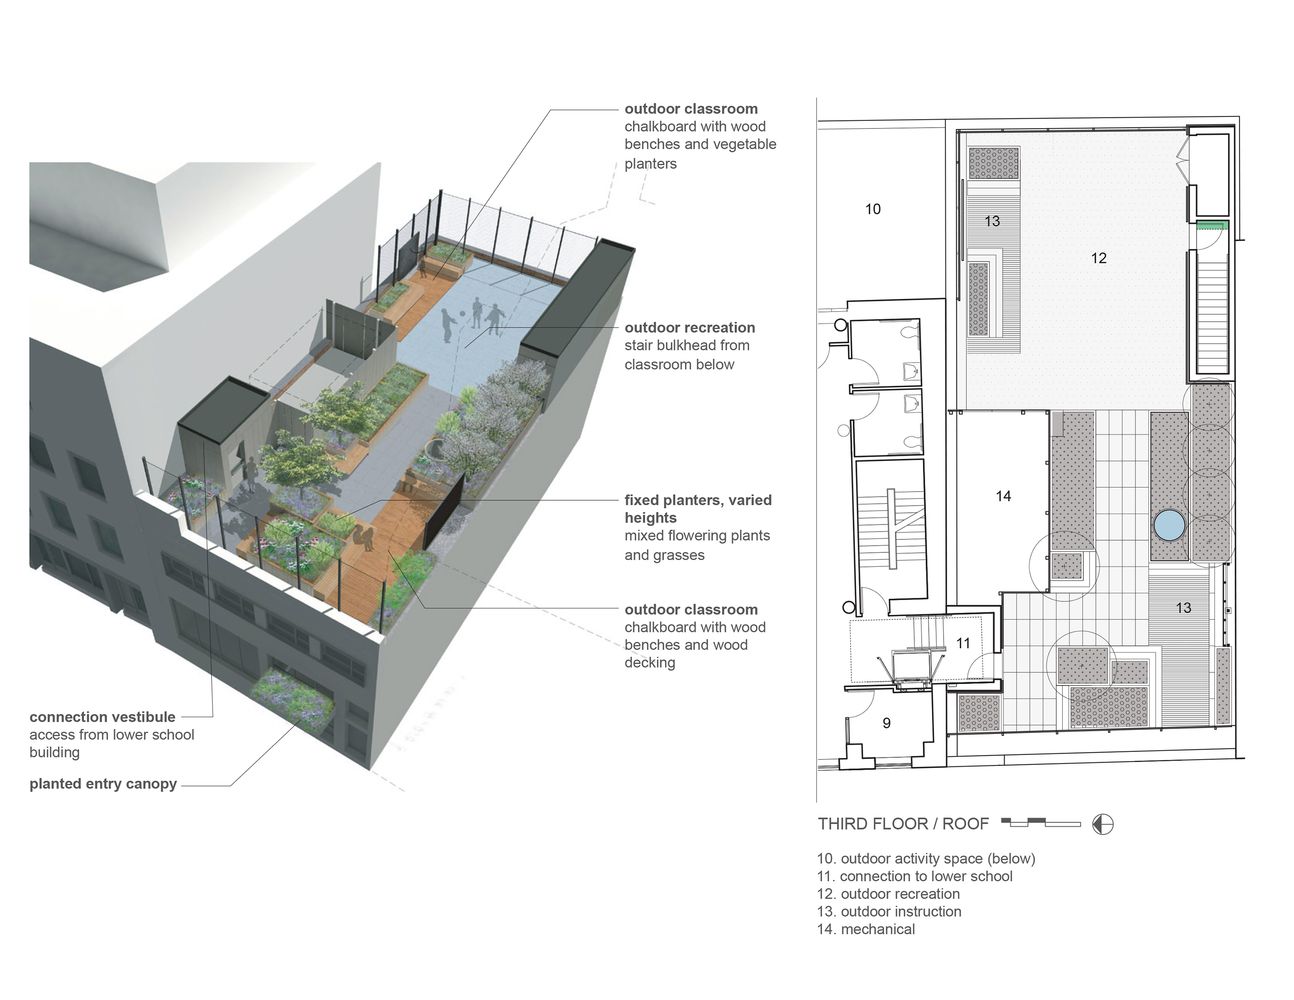
Gallery Of Blue School Middle School Pelloverton Architects 19 Architect Middle School Architecture Drawing Presentation
Revittize Slope Identification

Trim Interscting Roofs Autodesk Community Revit Products
Https Encrypted Tbn0 Gstatic Com Images Q Tbn 3aand9gcrj4c7eum Qy3g Bdq9yiamedmpqjmniou20xduotkonbmjyje Usqp Cau

Solved How To Do A Double Gable End In Revit Autodesk Community Revit Products
Solved Revit Sloping A Gable Roof Autodesk Community Revit Products

Create A Sloped Surface Using A Slope Arrow Revit Lt 2019 Autodesk Knowledge Network

Revit 2018 Adding Trusses Using Revit Extensions Timber Roof Ads Roof Trusses

Solved Spot Slope Not Reading Greater Than 12 Autodesk Community Revit Products
Source : pinterest.com
