Revit No Check Box To Finish Roof

Modifying A Yes No Parameter Appearance In Schedules Text Types Schedule Parameter

Yes No Graphic Presentations In Schedules

Missing Shape Editing Tool Autodesk Community Revit Products

Revit To Indesign Indesign Bim Image

Revit Tutorials Color Scheme Youtube

How To Create Wall Mount Handrail Revit 2018 Revit Bim Escadas

Autodesk revit 2008 raising the roof.
Revit no check box to finish roof.

Placing Face Based Families In Revit Projects Projects Base Face

Create Roads And Kerbs With Railings In Revit 2018 Youtube Revit Tutorial Revit Architecture Autocad Revit

Houston Cornice Autodesk Revit Architecture 2012 Families Urbim Revit Components Revit Architecture Autodesk Revit Architecture Model

Solved Revit Lt 2021 Issues With Realistic Printing Autodesk Community Revit Products

Bim Revit Adaptive Component 04a Modeling Tensile Fabric Structure L Canopy Youtube Fabric Structure Revit Tutorial Tensile Structures

Tips And Tricks To Make Your Revit Drawings And Presentations Look Great Autodesk University

Revit 2013 Roof Framing Extension Autodesk Revit Structure

Revit Tips Railing In Frozen Let It Go Frozen Let It Go Revit Architecture Railing

Google Earth To Revit Topography With Texture Material Youtube Revit Tutorial Building Information Modeling Revit Architecture
Create A Material Takeoff Schedule Revit Products 2018 Autodesk Knowledge Network

Dryseal Grp Through Wall Hopper Roof Installation Fibreglass Flat Roof Flat Roof

Bimethods 20140206 Class P1 02 Youtube Revit Tutorial Autodesk Revit Learn Revit

Dynamo Tutorials Part Ii Creating Revit Elements For Dynamo Youtube Autodesk Revit Autocad Tutorial Revit Tutorial

Issuu Interior Design Using Autodesk Revit Architecture 2013 By Johann Hudtwalcker Inter Revit Architecture Interior Design Student Interior Design Software

Youtube Wood Framing Walls Extensions Home Design Software Picture Frame Designs Timber Frame Construction

Pin On Revite

Formwork In Revit With Dynamo Architecture Model Parametric Design Structure Architecture

Gable Soffit And Fascia Vinyl Siding Installation Installing Siding Diy Roofing
Https Encrypted Tbn0 Gstatic Com Images Q Tbn 3aand9gcrplqwcmnlb1mxoe8yuyripw7nz7c5mlpp8x10yvlu Usqp Cau

Glazing Thermal Properties In Revit And Insight Revit Products 2018 Autodesk Knowledge Network
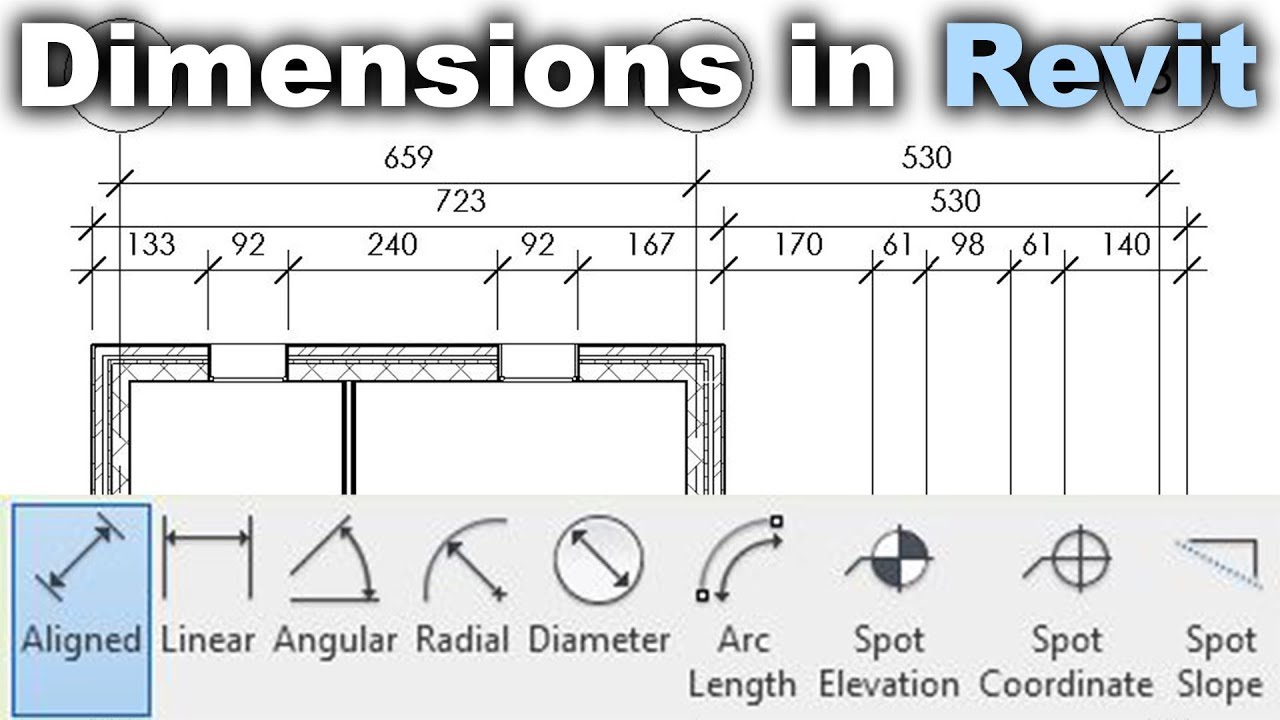
Dimensions In Revit Tutorial Youtube

Roofs In Revit 8020 Bim

Below Are Some Tests For Automating The Creation Of Revit S Adaptive Components Using The Api And P Building Information Modeling Revit Architecture Components
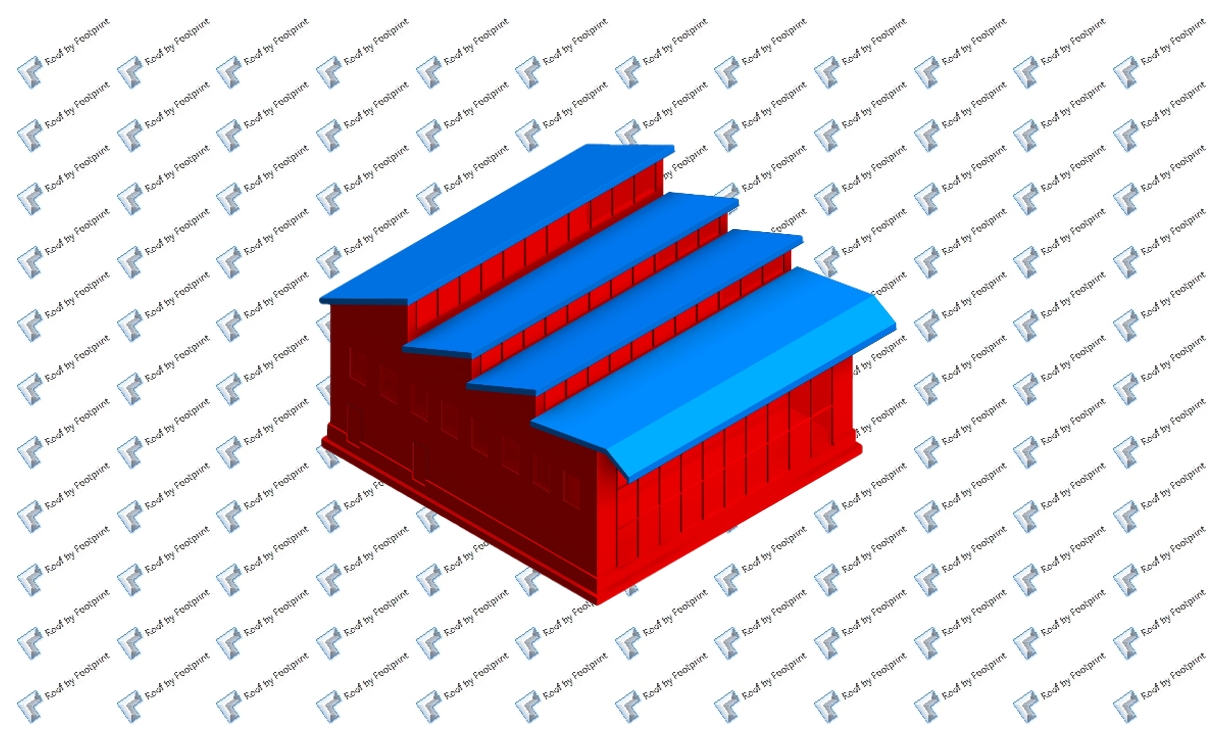
Common Types Of Roofs How To Model Them In Autodesk Revit Agacad
Source : pinterest.com
