Revit How To Make Top Level Of Roof Extend

Revit Tutorials Roofs Youtube

Join Roofs One Ridge Higher Than The Other Autodesk Community Revit Products

Revit Roof Basics 04 Intersect By Roof Join Cadclips Youtube

Solved Roof Level Overhang Autodesk Community Revit Products

Solved 2nd Floor Roof Extending Down To 1st Foor Ceiling Autodesk Community Revit Products

Place Spaces Up To The Roof Revit Products 2016 Autodesk Knowledge Network

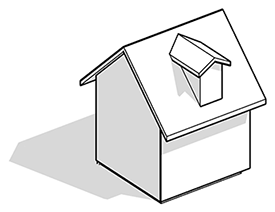
Normally and in most cases if a roof has two or more slope defining edges the orientation of the cut will be vertical.
Revit how to make top level of roof extend.

Elevation Masking Lines Y Exportacion A Photoshop Elevation Floor Plans Presentation

Top 10 Important Rendering Tips In Autodesk Revit Architecture Revit Architecture Autodesk Revit Architecture

Revit Roof Basics 10 Slope Arrow Cadclips Youtube

Adding A Roof In Revit Youtube

Revit Architecture Roof By Footprint Bimscape
Video Shape Editing Roof And Floor Slabs Revit Products 2018 Autodesk Knowledge Network

Revit House 09 Extending Walls To Roof Youtube
9 Tips To Understand Revit Roofs Revit Pure

Eave Returns Interpreting Gyhr Details Thisiscarpentry Gable Roof Design Roof Detail Colonial House Exteriors

Part 5 Create A Roof Revit Products 2020 Autodesk Knowledge Network

Revit Roof Tip 9 Join Roofs Add Opening To Create Dormer Youtube

Pin On Autodesk Inventor
Easy Revit 2010 32 1 Topography Part One Revit Tutorial Topography Project Steps

Slop Bottom Of Wall Autodesk Community Revit Products

How To Add Roof Ridge Tile In Revit Youtube

Image Result For Corner Scupper Roof Drain Detail Roof Drain Roof Cement School Architecture

Framing A Gable Roof Overhang Gable Roof Roof Overhang Garden Cabins

Integrated Project Delivery With Bim Building Information Modeling Bim Green Building Design
Https Encrypted Tbn0 Gstatic Com Images Q Tbn 3aand9gcqt Jag1pa Hofhz 59fqg8i0feamtfelr0xlmsrdq6chiqvxbg Usqp Cau

Design Collaboration For Aec Bim 360 Design Autodesk Building Information Modeling Bim Revit Architecture

Revitworld February 2015 Welcome To The First Edition Of The Revitworld Magazine Revitworld Is A Monthly E Magazine That You Can Downlo Revit Tutorial

Solved Revit 2016 Beginner Roof Problems Autodesk Community Revit Products

Solved Walls Not Attaching To Curved Roof Autodesk Community Revit Products

Create A Roof By Footprint Revit Lt 2019 Autodesk Knowledge Network
Source : pinterest.com
