Revit Create Roof Cut Profile

Revit How To Create A Profile And Wall Sweep In 2020 Wall How To Plan Sweep

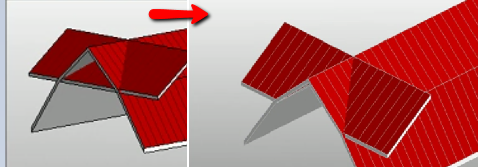
Cut Profile Youtube

Trapezoidal Wall Cladding Wall Cladding Cladding Revit Architecture

Revit Architecture Tutorial Creating Roof Shapes Revit Architecture Revit Tutorial Roof Shapes

Roof Ridge Tile Lima Parametrica Ridge Tiles Roof Ridge Board
How To Cut A Hole To A Roof Revit Lt 2018 Autodesk Knowledge Network

How to create a roof fascia in revit.
Revit create roof cut profile.
Drawing A Dormer In Revit Dormers Drawings Future House

Autodesk Revit Revision Numbering By Project By Sheet Autodesk Revit Projects Design

Sequence 03 Revit Architecture Revit Architecture Architecture Tool Design

How To Create A Pyramid Shape In Revit Pyramids Shapes Create

Revit Tutorial Understanding Your Roof Eaves Soffits Therevitkid Com Tutorials Tips Products And Information On Revit Tutorial Roof Eaves Tutorial

Autodesk Revit Tutorials 05 Adding The Roof In 2020 Revit Tutorial Autodesk Revit Revit Architecture

Autodesk Previews Enhancements For Advance Steel And Steel Connections For Revit At Nascc 2017 Bim And Beam Steel Design Steel Metal Words

20150212 Computational Practice Lab 06 091 Revit Tutorial Building Information Modeling Revit Architecture

Creating Sloped Walls In Revit Wall E Site Autodesk Revit

Revit Architecture 2011 Beginners Tutorial 4 Windows Doors Wall Assembly Via Youtube Revit Architecture Revit Tutorial Architecture

Wall Incorporacion De Relieves A Muros Board And Batten Batten Wall

How To Do Wall Tiling In Revit Using The Paint Command Wall Tiles Revit Tutorial Wall

Como Crear Este Tipo De Muro Architecture Program Chart Bar Chart

Revit Curve Grid Autodesk Revit Grid Curve

Simply Complex Qa Qc Your Revit Structural Framing Using The Structural Analytical Model Roof Framing Structures Parametric Architecture

Revit Helicoidal Tips

Autodesk Revit Mep 2015 Tutorial The Revit Mep 2015 Interface Arquitetura

Revit Gambrel Barn Roof Youtube

Creating Pattern In Revit Youtube Pattern Create Yourself Create Your Own

Pin On Revit By Others

Shed Roof Square Cut At Top Edge Please Help Autodesk Community Revit Products

How To Make A Window With Reveal Revit Architecture Revit Architecture Revit Tutorial Architecture

Modify Line Style In Revit Panel Doors Style The Originals

Youtube How To Use View Range Revit Tutorial Revit Architecture Autodesk Revit
Source : pinterest.com
