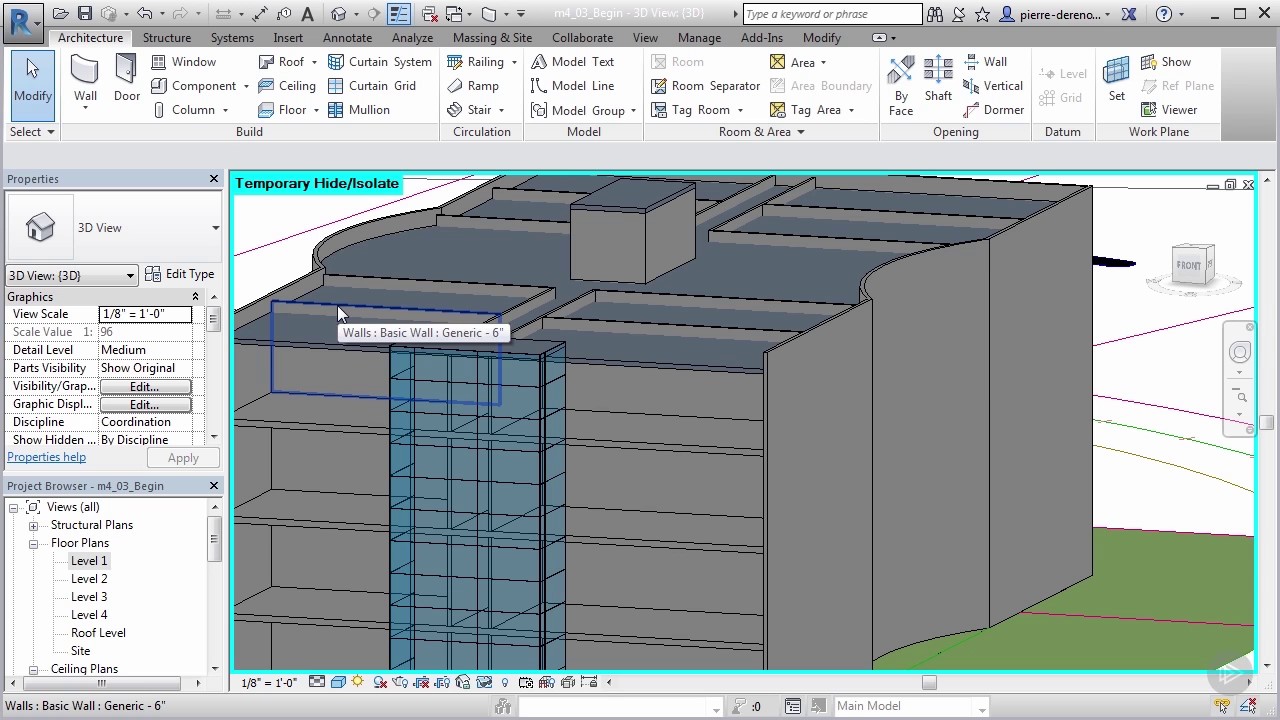
Revit Align A Stacked Wall Change To A Sloped Roof

Revit Roof Cleaning Up Overlapping Roofs Youtube

Link Revit File Align And Copy Level Grid Copy Monitor Grid Alignment Monitor

Revit Wall Wrap Closure A How To Guide Youtube
Copying Walls To Multiple Levels In Revit Youtube

Revit Tips Tricks Demolish Parts Of Wall Within Phasing White Text On Black Background Youtube
Revit Tutorials Custom Wall Parapet Youtube
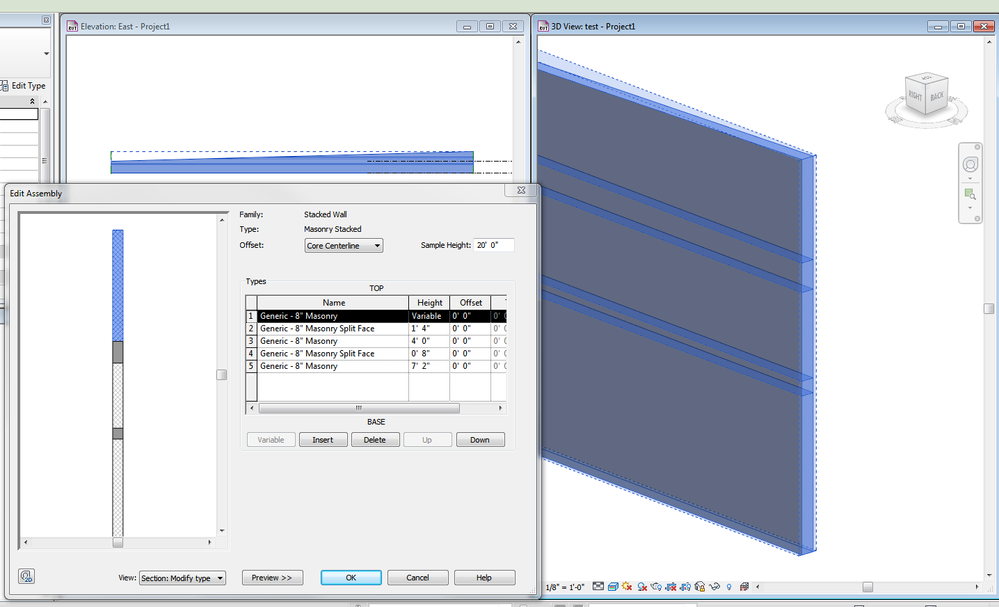
Define the structure of a stacked wall you can change the structure of a stacked wall in several ways.
Revit align a stacked wall change to a sloped roof.

Solved Rotate Error Can T Rotate Element Into This Position Autodesk Community Revit Products
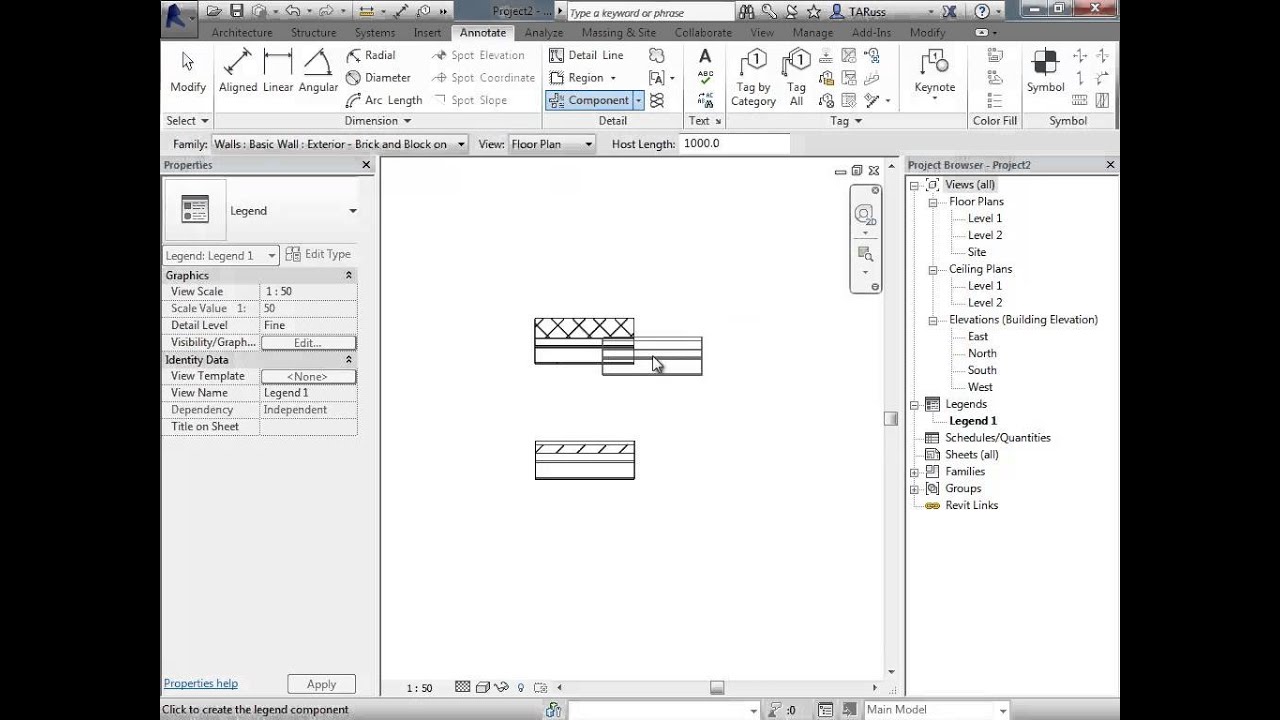
Revit Wall Tags And Wall Types Legend Youtube

Wall Joins Youtube
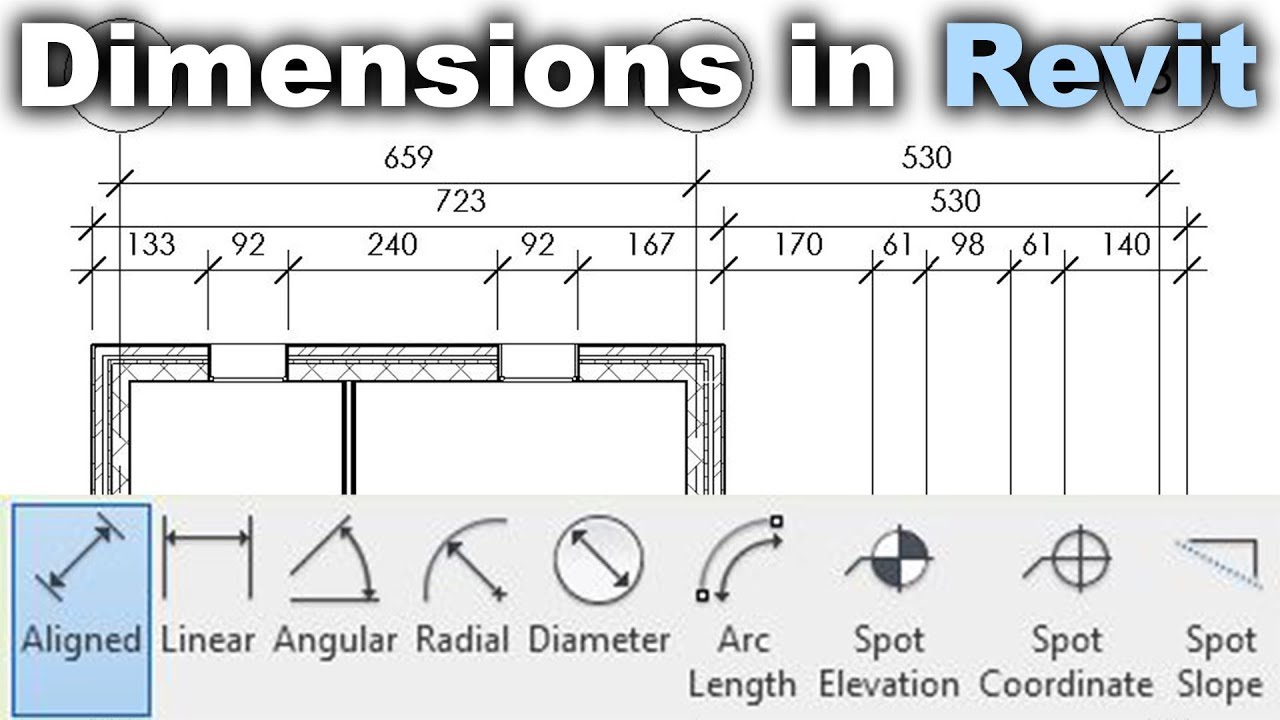
Dimensions In Revit Tutorial Youtube

021 Tutorial How To Work With Angled Grid Lines In Revit Architecture Youtube

Modify The Vertical Structure Of Walls Youtube

More Basics With Revit Walls Profiling Your Foundation Walls Synergis

Align The Render Appearance To The Surface Pattern Revit Products Autodesk Knowledge Network

Roofs Overview Revit Products Autodesk Knowledge Network Roof Autodesk Umbrella
Curtain Wall Can T Make Wall Error Edit Profile Autodesk Community Revit Products
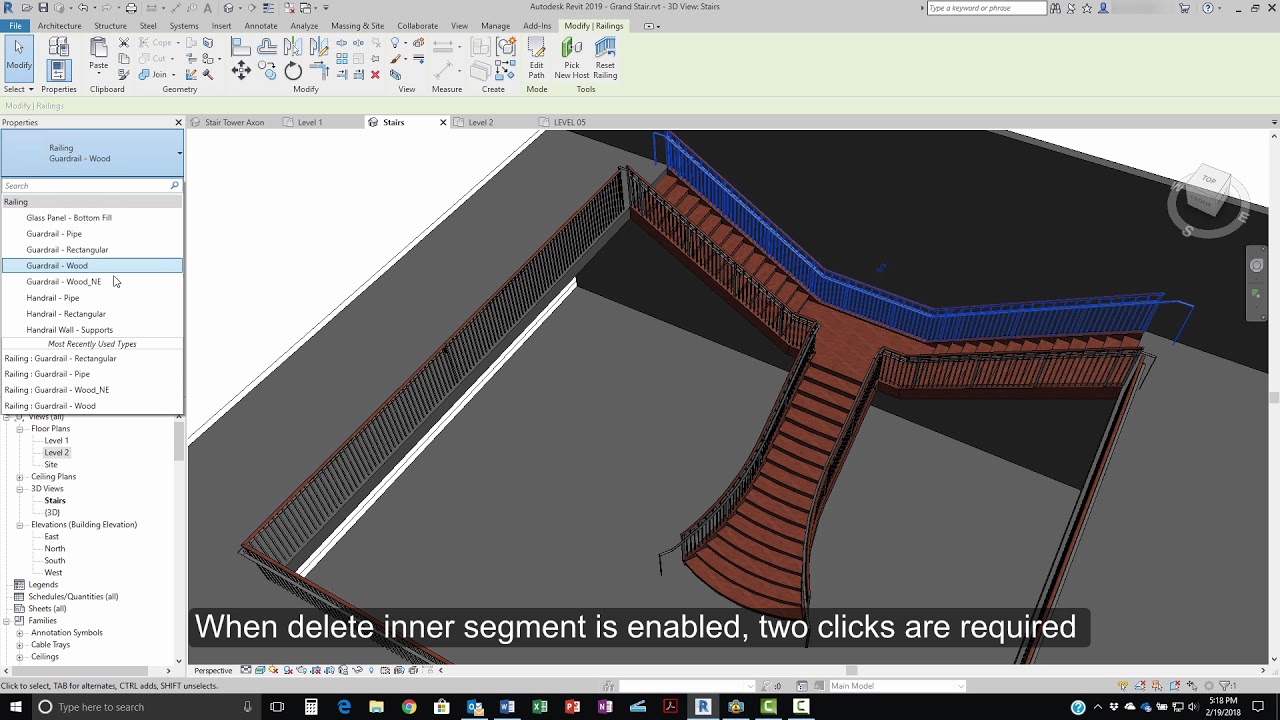
Revit 2019 Split Railings Youtube

Drawing A Dormer In Revit Dormers Drawings Future House

Pivot House Huisplattegronden

Autodesk Revit 7 Cadalyst

Metal Stud Walls In Revit Stud Walls Wall Metal

Tips And Tricks To Make Your Revit Drawings And Presentations Look Great Autodesk University

Revit Tutorial Constant Slope Rigging Family Rigid Insulation Revit Tutorial Rigid Insulation Tutorial

Revit To Indesign Indesign Bim Diagram
Https Encrypted Tbn0 Gstatic Com Images Q Tbn 3aand9gcrytk5unwnp Lu48whqejw0acgqlu P776c4pvpug7xoix9fwx0 Usqp Cau
Revit 2020 For Architecture No Experience Required By Eric Wing Paperback Barnes Noble

Engineer Civil Revit Jeffery J Jensen Wiki

Https Encrypted Tbn0 Gstatic Com Images Q Tbn 3aand9gcqh4jqmjvlm1 Gmi9kcu W5scg4i7yg147moq Usqp Cau
Http Www Andrew Cmu Edu User Ramesh Teaching Course 48 749 Doc Lecture 2b Pdf

Truss For A Shed Roof In Revit Truss Family Tutorial Youtube
Source : pinterest.com
